Bad audio makes viewers swipe away fast, even when your video looks great. On Instagram Reels, most people watch with sound on, so muffled voices lead to instant skips and lower retention. At the same time, platforms tend to reward videos with clean audio, because it keeps people watching (and sharing) longer.
If you’ve ever watched your own clip back and thought, “Why does this sound so off?” you’re not alone. Often, it’s not your camera, it’s the basics: the mic is too far, wind is hitting the capsule, your room has too much echo, or your levels are peaking. That’s why learning how to record clear audio for your videos matters more than most creators expect, especially for YouTube, TikTok, and Reels where seconds decide everything.
You don’t need a fancy studio to fix this, either. Next, you’ll sort out the right gear for your setup, then dial in smart placement and gain (so your voice stays crisp without distortion). After that, you’ll focus on practical techniques to cut noise, manage distance, and avoid common traps like handling noise and bad room reflections. For 2026, wireless options with noise cancel are big for a reason, including DJI Mic 2, Rode Wireless Pro, and Hollyland Lark M2, since they help you stay clear when you’re moving and filming outside.
Ready to get pro audio without overthinking? Start with picking the right mic for the way you shoot.
Pick the Perfect Microphone to Capture Every Word Crisp
The best mic choice comes from one simple question: Where will your voice be in relation to the mic? If your talking head stays in place, go small and close. If you move through scenes, point a mic where the voice lives. If you roam and still need clean speech, wireless systems do the heavy lifting.
Also remember this rule of thumb: bring the mic to your mouth, not the other way around. In most setups, 6 to 12 inches gives you stronger signal, less room echo, and fewer headaches with gain.
Before you compare models, stock your “audio basics” too. Add a windshield for outdoor work (it cuts wind rumble fast). Use a pop filter if your content has lots of hard P and B sounds. Finally, if you want a safety net, consider an external recorder with solid preamps so you have a backup capture if the camera feed glitches.
Lavalier Mics: Your Go-To for Hands-Free Talking
Lavalier (lav) mics shine when you need natural, consistent voice for talking heads, presenters, and interviews. Because the clip-on mic rides on your clothing, you get stable distance and steadier tone. In other words, it sounds less like “mic technique” and more like the person talking.
For 2026, here are solid lav options creators pick often:
- DJI Mic 2 (about $269)
Strong AI noise reduction and easy setup, great for travel vlogs and interview sit-downs. It also records backup audio in the system.- Pros: simple, reliable outdoors, sound stays clear
- Cons: higher price than entry wireless kits
- Hollyland Lark M2 (about $159)
Tiny transmitters that stay out of the way, ideal when wardrobe matters.- Pros: comfy, discreet, good voice clarity
- Cons: less forgiving if you record too far away
- BOYA Mini (about $59)
A budget-friendly way to get clips-for-free quality without learning everything first.- Pros: low cost, decent noise handling
- Cons: not as polished as premium kits
Placement matters more than fancy specs. Clip the mic 6 to 12 inches from your mouth, angled toward your face. Keep it away from fabric rub, jewelry, and jacket zippers. When you can, run the cable under clothing to reduce handling noise.
For extra guidance, you can compare real-world impressions in Imaging Resource’s DJI Mic Mini review.
If your lav sounds muffled, check the mic orientation first, then the distance.
Shotgun Mics: Zero In on Voices Amid Action
Shotgun mics focus on what’s in front of them. That directional pickup helps reject off-axis noise, like traffic, room chatter, or background music. For run-and-gun filming, that focus is gold because you often cannot control where sound comes from.
These mics work best when you treat them like a spotlight. Move the mic toward the voice, and the audio improves immediately.
In 2026, popular picks include:
- RØDE VideoMic NTG (around $301)
A practical balance for creators who film on-camera or on a boom.- Pros: works on camera or boom pole, includes safety track features
- Cons: a bit larger than tiny on-camera mics
- Sennheiser MKH 416 (premium pricing)
The classic choice when you need broadcast-style consistency.- Pros: dependable, crisp detail
- Cons: expensive for beginners
- RØDE VideoMic Go II (budget-friendly)
Great for learning, especially for casual b-roll and light travel.- Pros: easy and light
- Cons: not as powerful as higher-end models
Pairing with a boom makes the biggest difference. On a boom, you can keep the mic at the “sweet spot” near the speaker’s mouth, without the camera blocking it. Use a short boom distance and keep the mic off to the side of wind sources.
Wireless Mics: Freedom with Crystal-Clear Range
Wireless systems let you move, walk, gesture, and film events without cable stress. In 2026, the big upgrades are ANC (active noise canceling), longer outdoor range, and dual-channel recording for two speakers.
Here are strong 2026 wireless choices for video creators:
- DJI Mic 3 (about $350)
Known for standout ANC and long range, plus dual-channel support.- Pros: ANC noise blocking, 400m range, dual-channel, 32-bit float safety
- Cons: pricier, and it may not fit every input setup
- DJI Mic 2 (about $269)
A close step-down that still delivers strong results.- Pros: AI ANC for roads and outdoor noise, backup recording
- Cons: less range and storage than newer kits
- RØDE Wireless Pro (around $399)
Great when you want features for pro workflows like timecode.- Pros: long runtime, dual-channel, 32-bit float safety track
- Cons: bulkier transmitters and setup
- Hollyland Lark M2S/MAX 2 (about $159–$299)
For creators who want small transmitters and clear voice on the go.- Pros: discreet, ~300m class range, strong everyday clarity
- Cons: ANC typically not as strong as DJI’s top models
For wireless mics, signal breaks are usually about line-of-sight, walls, and bodies in between. So test your range in the exact location you’ll film. Also, treat windshields as non-negotiable outdoors, because wireless systems still capture wind the moment it hits the capsule.
Build a Quiet Recording Spot That Sounds Like a Studio
Clear audio starts before you touch your mic. If your room rings, your voice will ring with it. So your goal is simple: get direct sound (your voice) and minimize reflections (echo and buzz).
Think of your recording spot like a sponge. The more surfaces that absorb sound, the less your mic hears the “room” and the more it hears you.
Find or Create Spots with Zero Echo and Buzz
You can build a studio vibe with what you already own. Start with locations that naturally act like sound traps. Closets are famous for a reason. The clothes soak up high frequencies, so your speech sounds tighter right away.
When you pick a spot, avoid rooms with hard, flat surfaces (bare walls, tile floors, and windows). Also steer clear of traffic sounds and HVAC vents. If you can hear a steady hum, your mic will capture it too, especially during soft speech.
Here are home hacks that work fast and budget-friendly:
- Use a closet with clothes
Hang the mic near your mouth and close the door. Clothes act like “soft foam,” so reflections drop a lot. - Drape blankets in a “V” shape
Put thick blankets behind you and along the sides. This helps stop sound from bouncing straight back at the mic. - Add rugs or a thick towel pile
Floors reflect sound like a mirror. Lay something thick where you stand and where the mic “sees” the floor. - Cover the nearest hard surfaces
If there’s a desk, window, or door panel nearby, throw a blanket over it. You want fewer smooth bounce points. - Use professional absorbers if budget allows
If you’re ready to upgrade, add rigid panels or acoustic foam (or better, thicker absorbers) at the spots where sound reflects. For placement ideas, watch DIY acoustic panel building tips from the In The Mix channel.
Next, test your space. Record a quick 5 to 10 second clip, then listen with headphones. If it feels like your voice has a tail, it needs more absorption near you.
You can also do a “clap test.” Stand where you’ll record and clap once. If you hear a clear slap-back, keep adding soft stuff on walls and at floor level until the clap fades fast.

One more gotcha: buzz often comes from the “quietest” corners. A closet can be great, but check for electronics. Move your setup if you hear a laptop fan, charger hum, or a light transformer sound.
If your room sounds flat and dry, your mic placement gets easier. You’ll hear your voice, not the space.
Position Your Mic and Camera for Flawless Capture
Once your spot is quiet, placement does the rest. You want your mic to capture your voice directly, while your camera stays steady and your framing stays consistent. It’s like aiming a flashlight, not a floodlight.
Also, monitor while you record. Use closed-back headphones so you can catch plosives (hard P and B bursts), breath noise, and distortion in real time. If you rely on playback later, you often fix issues too late.
Step-by-step: Mic 6-12 inches from source, angle to dodge plosives, camera stable
Use this quick setup rhythm. It’s fast, and it saves re-takes.
- Set the camera first
- Put it on a tripod.
- Frame your face at about eye level.
- Tighten the tripod knobs before you start talking.
- Place the mic at the right distance
- Start with 6 to 12 inches from your mouth.
- Aim so the mic “sees” your voice, not your room.
- Angle the mic off-axis
- Turn the mic 30 to 45 degrees to the side of your mouth.
- This helps you dodge harsh breaths and plosives without making your voice dull.
- Control the pop zone
- If you use a pop filter, keep it 1 to 2 inches in front of the mic capsule.
- If you don’t use a pop filter, angle becomes even more important.
- Avoid breath and saliva spray
- Don’t point the mic straight at your lips.
- Instead, aim slightly above or to the side, then adjust after a test line.
- Stabilize your whole setup
- Avoid touching the table during recording.
- If you gesture, keep movements smooth so you don’t create cable rustle.
Here’s a simple “capture checklist” you can run before every take:
- Mic distance: 6 to 12 inches
- Mic angle: 30 to 45 degrees off-axis
- Pop filter: between mouth and mic (if used)
- Headphones: on, monitoring live
- Camera: tripod, eye level, locked frame

Next, record two audio sources. This single habit saves entire videos.
For example:
- Main audio: wireless mic receiver (or your external recorder)
- Backup audio: camera mic input (or a second channel)
Set both to record, then set levels so one doesn’t clip. After that, even if one source gets an issue, you still have a clean option.
Finally, do one short test and check acoustics. Speak your hardest words first (words with P, B, S, and T). Then listen through headphones. If your S sounds hissy, reduce mic on-axis time and back it up slightly. If your voice booms, move the mic a bit farther away and keep it off the direct path of your mouth.
Place your camera and mic like a matched pair. The camera should stay locked and calm. Meanwhile, the mic should stay close to your voice, but not in line with your breath. That balance is what makes the audio feel like a studio recording.

Nail Recording Techniques That Guarantee Clean Tracks
Clean tracks don’t come from luck. They come from a system you follow every time, even when you feel rushed. If you nail your monitoring, you prevent the two biggest killers of clarity: clipping and weak signal.
Then, once levels and capture are solid, you move to a safety net. Dual tracks keep your shoot alive when something goes wrong, like a lav cable rub or a wireless hiccup.
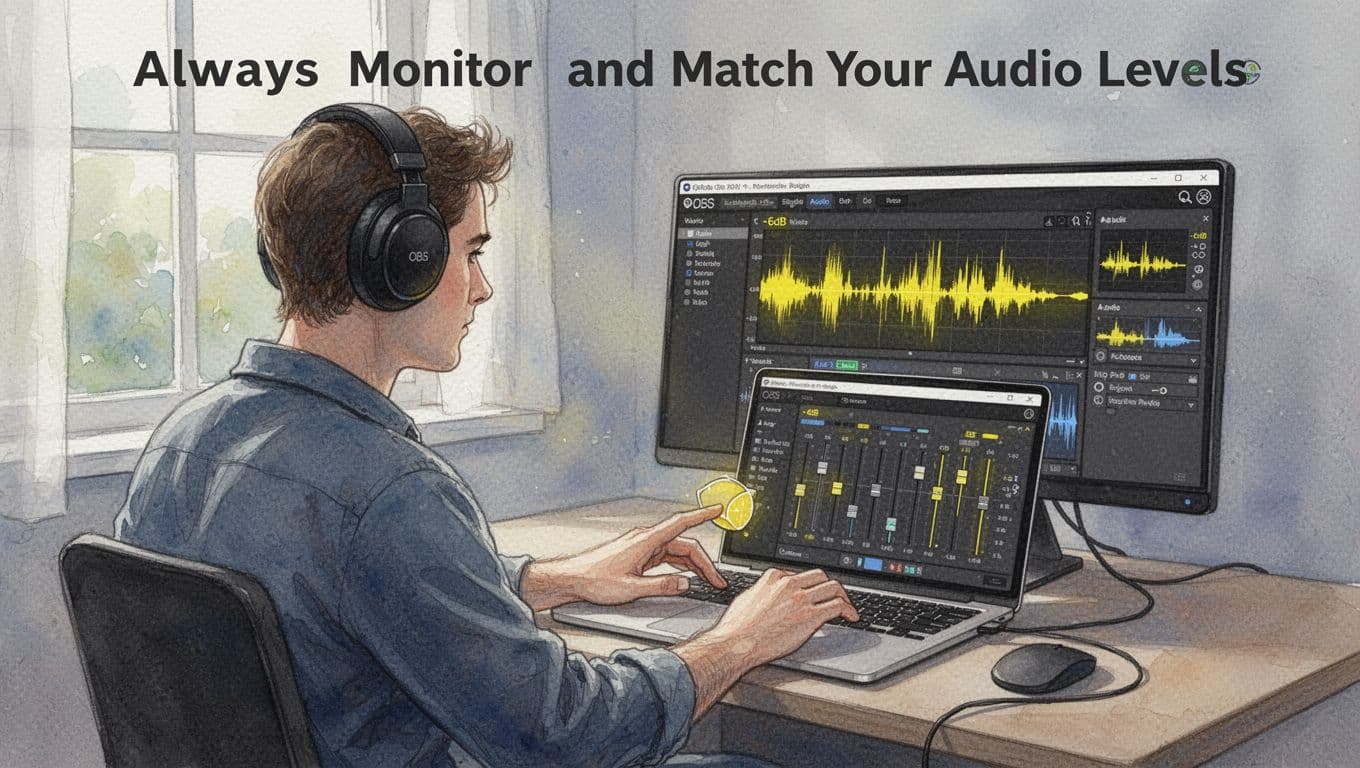
Always Monitor and Match Your Audio Levels
Monitoring is your early warning system. Your ears help, but your meters catch problems before your voice sounds broken. If you want clean audio, watch levels while you record, then confirm with playback.
Set your peaks around -6 dB (and stop the red)
Start with a simple target: keep your loudest moments near -6 dB on your meter. That gives you headroom for normal speaking, and it keeps peaks from hitting clipping territory. In OBS, you should aim to stay out of the red zone during the loud parts of your take.
Here’s a quick way to set it up live:
- Put on closed-back headphones (not speakers).
- Start recording or hit test record.
- Speak at your normal pace, then push through your loudest line.
- Adjust mic gain until your meter peaks around -6 dB.
- Do one more pass, because people get louder after the first take.
If you see peaks jump suddenly, treat that like a smoke alarm. Back off the gain, then retake. For extra help, use guidance like how to prevent clipping during recording.
Fix peaks in real time with gain, plus a limiter
You don’t want to “fix it later” when clipping happens. Distortion is like a cracked plate, you can’t uncrack it. Instead, control peaks during the recording.
Use this chain mindset:
- Gain first: get your normal speaking level close to target.
- Limiter second: cap sudden spikes so they stop short of clipping.
In OBS, a simple limiter setup can help if you occasionally get loud. Look for a limiter threshold around -3 dB (or just below where clipping starts on your meters). The goal is not to squash every word. The goal is to protect the top end.
If you want a deeper explanation of why clipping ruins clarity, learn how to stop mic clipping and distortion.
Headphones catch breath pops, buzz, and “wrong-sounding” levels before they show up in the final export.
Do pre-roll tests with slate claps (and keep volume consistent)
One of the easiest ways to guarantee clean sync and steady levels is a pre-roll habit: slate clap. Do it at the start of each take, and record it clearly. The clap gives you a sharp sync point and it also shows you your real peak behavior.
Then speak at a consistent pace. Don’t “perform louder” at random. Think of your voice like a metronome. When you keep your volume steady, your audio stays even, and you waste less time fixing levels in post.
Also, monitor while you shoot. Don’t trust the idea that “it sounded fine earlier.” In short, capture first, adjust live, confirm with playback, then move on.
Finally, if you record video in OBS with high-quality settings, keep your audio clean alongside it. For 2026 workflows, a common quality approach uses CQP 16–17 (and high-bitrate audio). If you want a quality-focused reference, use the same principle: get peaks to your audio meter target, then keep video quality high without forcing audio to compensate.
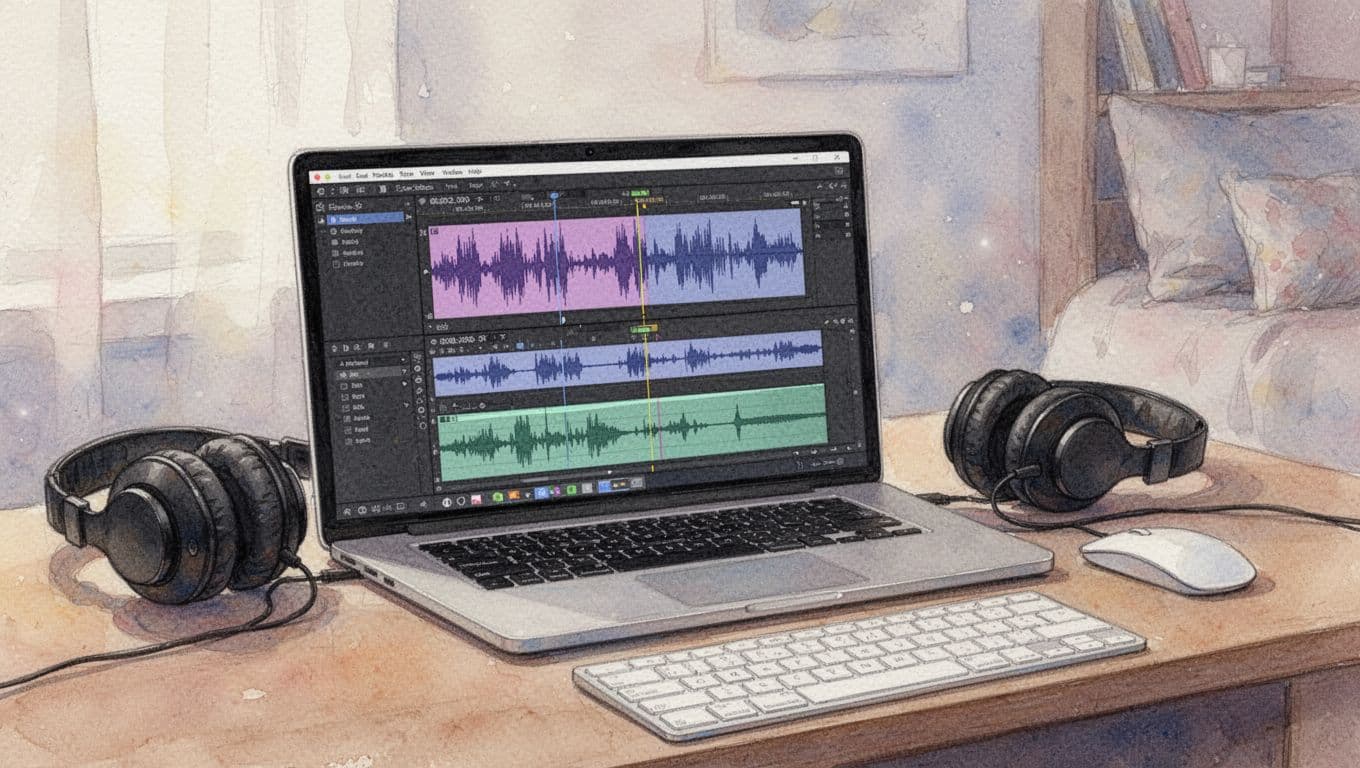
Record Dual Tracks to Save Your Shoot
Dual tracks turn “ruined take” into “usable take.” They give you a backup capture path, so you can swap audio in editing without starting over. Think of it like carrying a spare key. You might not need it, but you’ll be glad it’s there.
Why two sources rule (even when your setup is good)
Even strong setups fail. Cables get brushed. Wind hits the mic. Wireless link timing drifts by a fraction. Rooms change. One track might get a small problem you only notice later.
When you record two tracks, you get redundancy and choice:
- Main track: the mic you expect to be best.
- Backup track: another mic path that likely stays clean when the main one doesn’t.
For example, your main audio might come from your wireless receiver. Your backup could be the camera’s audio input. In many real shoots, one of them stays usable when the other struggles.
If you want a workflow overview that fits editing decisions, see sync audio to video for clean edits.
Sync tips: use the slate clap, then align waveforms
Dual tracks only help if you sync them quickly. The slate clap makes this painless. Start every take with the same pre-roll action, and keep the timing consistent.
In editing, use these rules:
- Find the clap spike on the waveform.
- Line up both tracks so the transient hits at the same spot.
- If the clap spike isn’t clear, use a short word like “ready” for alignment.
After sync, choose your final track based on intelligibility. Pick the one with clearer consonants and fewer distortions. Then, if you hear small issues, you can cut between tracks for just those moments. That method beats re-recording an entire segment.
Record dual tracks the same way every time
Consistency saves time. Before you roll, confirm both recording paths are armed and actually recording. Don’t assume. A simple “record status check” takes seconds and prevents hours of frustration.
Also, keep levels matched. If Track 1 peaks around -6 dB and Track 2 peaks at -20 dB, your backup becomes harder to use. Aim for similar loudness targets on both tracks so either one can carry the scene.
Lastly, keep headphones on. Even with dual tracks, you still need to hear what’s happening live. If one mic starts buzzing or drifting, you catch it early and can fix it before the whole take goes bad.
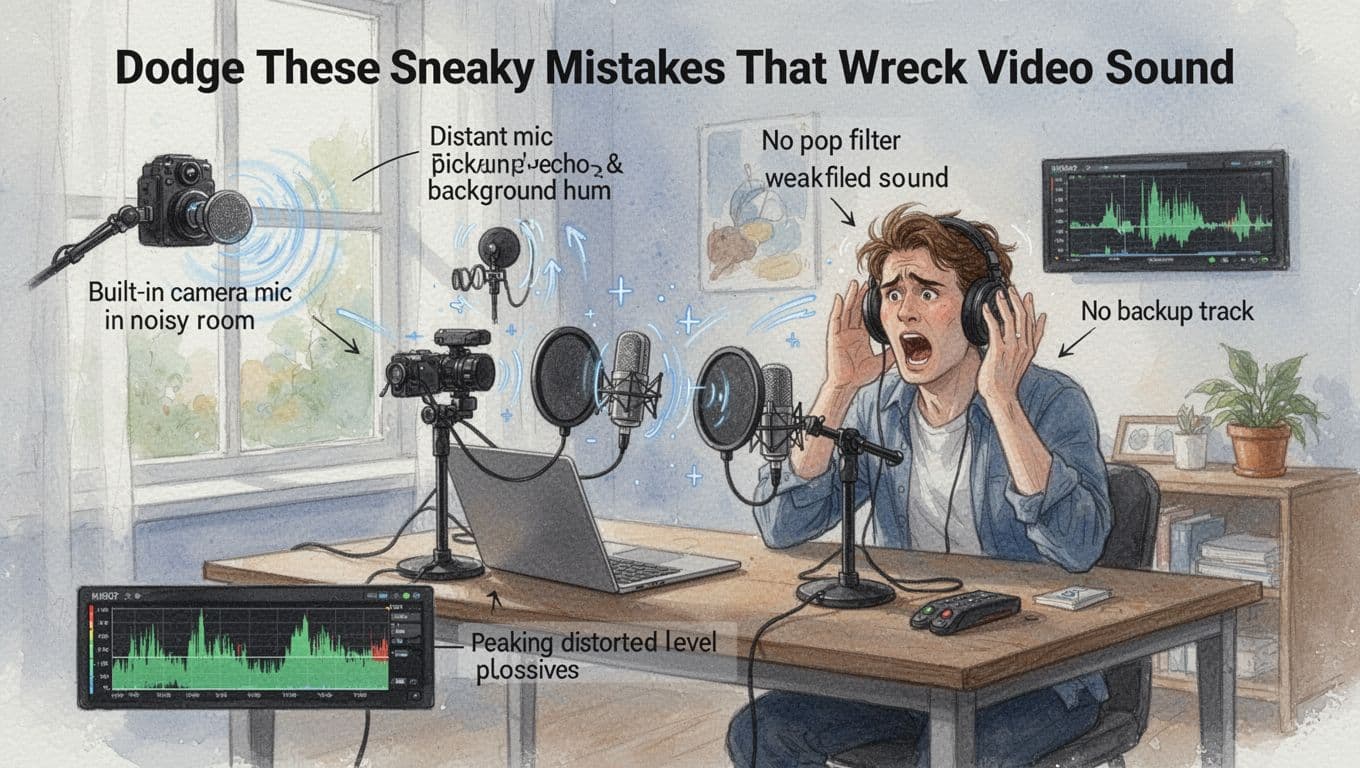
Dodge These Sneaky Mistakes That Wreck Video Sound
Even when your camera looks sharp, video sound can still fall apart fast. Usually, the issue comes from small habits that stack up. So you end up with audio that feels thin, echoey, or distorted, and viewers bounce within seconds.
Here are the top audio mistakes that wreck clarity, plus quick fixes you can apply right now.
- Sticking to your camera’s built-in mic
Built-ins grab everything around you, not just your voice. That means room echo, keyboard clicks, AC hum, and distant noise all get mixed in at the same volume. The result sounds “far away,” even if you’re sitting close.
Quick fix: Swap to an external mic (lav, shotgun, or USB mic). If you must use the built-in, record in your quietest spot and keep your voice loud and steady, but plan to upgrade. - Choosing noisy spots (or filming near vents and fridges)
Background noise quietly fights your voice. Then, when you turn up the mic later, you also turn up the problem.
Quick fix: Pick a quieter area, close windows, and turn off noisy gear. Do a 10-second test recording and listen with headphones. - Using a distant mic
Too far away equals weak signal and more room sound. Your voice becomes boxy or hollow, and words lose their edges.
Quick fix: Follow the proximity rule. Start with the mic about 6 to 12 inches from your mouth, then adjust distance until your speech sounds solid. - Ignoring wind, plosives, and breath noise
Wind makes low-end rumble. Plosives (P and B sounds) create sudden blasts. Breath can add a constant hiss. These issues feel harsh and distracting.
Quick fix: Add a windshield outdoors and keep a pop filter or adjust mic angle off-axis. For more on plosive control, see stop microphone popping tips. - Not having a backup audio path
When your main audio fails, “fix it in post” usually means damage control. If you lose one track, the whole take can become unusable.
Quick fix: Record dual audio (main mic plus camera mic or an external backup). Even one good backup clip saves the edit.
Next, let’s talk about the room itself, because it can ruin clean audio even when your mic is decent.
Never Trust Your Camera’s Built-In Mic Alone
Camera built-ins are tempting because they work “out of the box.” However, they behave like a wide net. Instead of capturing your voice, they also catch fan noise, wall reflections, and little sounds you never notice during filming. That’s why your voice can sound dull or far away, even at a close distance.
Also, built-in mics often sit in a bad place for speech. They capture more “room sound” than direct sound. Then you try to fix it later with EQ or noise reduction, which usually makes the voice feel tighter but less natural. It’s like trying to fix a blurry photo by adding more sharpening, you still end up with edges that look wrong.
The easiest swap is to move the microphone closer to your mouth and reduce the amount of room the mic hears. If you want a quick upgrade path, start with a simple external option like a lav mics for talking heads or a shotgun mic for interviews and on-camera speaking.
Here’s a simple decision rule:
- Talking and staying mostly still: choose a lav.
- Speaking while moving or filming b-roll: choose a wireless mic.
- One person on camera with controlled framing: choose an external on-camera mic.
If you want placement guidance that quickly fixes echo and plosives, check out where to put your microphone. Even small changes in distance and angle can turn “meh audio” into crisp speech.
Most importantly, treat your camera mic as a backup, not your main voice capture. That mindset alone prevents a lot of painful edits.
Skip Noisy Rooms and Far-Away Mics
A noisy room acts like a constant competitor. Even mild hum (AC units, laptops, fridge cycles) makes your voice harder to understand. Then, when you turn up the mic to fight it, you also boost the noise. Your audio becomes louder but not clearer.
Bad rooms also add echo and blur. Hard walls throw sound back at the mic. As a result, your words lose that tight, “in your face” clarity that makes people stay.
Look for these signs of bad audio spots:
- Your voice sounds thin or distant, even when you speak clearly.
- S sounds hissy or fuzzy instead of crisp.
- You hear a steady background tone, like fan hum or power buzz.
- Your voice has a “tail,” like a faint repeat after each sentence.
Now match that to your mic distance. When your mic is too far, you mainly capture the room, not the speaker. It’s the same idea as filming a person in a stadium with a phone mic from the parking lot. The voice is there, but it arrives late and weak.
Use the proximity rule:
- Start with 6 to 12 inches from your mouth.
- Adjust until your voice sounds direct, not echoey.
- If you must stay farther away, use a mic with better direction (or add a closer pickup like a lav).
Before you roll for real, do one quick test clip and listen with headphones. If the room is the problem, the test shows it instantly. If distance is the problem, you’ll hear it right away too.
Fix and Enhance Audio in Post Like a Seasoned Editor
Once the recording is decent, post-production decides whether your audio sounds “phone-call” or “clean studio.” Think of editing like sanding wood. You remove rough edges until the surface feels smooth and even. With AI tools, you can fix the hard stuff fast, then finish with simple level and EQ moves.
Top AI Tools to Rescue Tough Audio Problems
When audio gets messy, use AI with a clear goal. Noise needs one kind of fix. Echo needs another. Clipping and harsh peaks need damage control. In 2026, one-click AI is faster than ever, but overusing it can make voices sound flat or robotic.
Here’s how I choose between AudioEnhancer, Auphonic, and Adobe Speech Enhancer (Enhance Speech).
| Tool | Best for noise | Best for echo/reverb | Best for harsh peaks/clipping | Best when you edit in |
|---|---|---|---|---|
| AudioEnhancer | Strong noise removal | Good echo cleanup | Focuses on clipping-style issues | Quick browser fixes |
| Auphonic | Very natural noise handling | Strong room control | Helps reduce harshness via leveling | Audio-first workflows |
| Adobe Enhance Speech | Solid clarity restore | Good reverb reduction | Helps soften bad peaks | Premiere Pro or Audition |
A practical rule: if your file is rough but you want speed, start with AudioEnhancer.ai. If you need consistent loudness across many clips (and you want it to still sound like you), pick Auphonic. If you live inside Adobe apps, use Enhance Speech because it fits right into your editor.
For Adobe-specific steps, see Adobe’s Enhance Speech guide for Premiere.
Also, use AI in passes, not in one big slam. First clean the problem, then stop. After that, switch to human control: trimming, EQ, and leveling.
Screenshot idea: capture a before/after waveform view (peaks, noise floor, and any clipped segments) so readers can spot the difference instantly.
AI fixes are like a first-aid kit. Real clarity comes from the final checks.
Easy Editing Steps in Free Software
After AI rescue (or if your audio is already usable), you still want a simple, repeatable workflow. Free tools can do this well if you follow the order: import, sync, clean, export.
Here’s a workflow that stays simple in free editors like DaVinci Resolve Fairlight or even OBS-based workflows for capture and export.
- Import dual tracks
- Bring in your main mic track and backup track.
- Keep both visible in the timeline.
- Sync using the slate clap
- Find the sharp clap transient.
- Align both tracks so the clap spike hits the same point.
- Clean with light moves
- Start with noise reduction (low to medium).
- Add EQ to reduce harshness (usually a small cut in the “mud” area).
- If you hear room echo, reduce it gently. Strong echo removal can leave “watery” artifacts.
- Fix levels and loudness
- Normalize or adjust gain so dialogue lands at a consistent level.
- Avoid chasing “louder” by boosting noise. Instead, trim and balance.
- Export in a clean format
- Export audio with no extra processing.
- Then combine with your video export settings.
If you want a tighter guide for multi-track handling in Fairlight, this walkthrough helps: DaVinci Resolve multi-sound editing steps.
Screenshot idea: include one screen showing the timeline with both tracks lined up after the clap, then another showing the EQ/noise reduction settings panel.
Most editors get stuck because they try to fix everything at once. Do it in order, and your audio will stop feeling like guesswork.
Conclusion
Clear audio usually comes down to one strong habit: get the mic close enough that it captures your voice first. When distance, gain, and placement stay consistent, your videos sound crisp, not distant, and people keep watching.
From there, smart setup does the heavy lifting. Use 2026 wireless kits (DJI Mic 3, DJI Mic 2, Rode Wireless Pro) for clean speech on the go, record dual tracks so one hiccup never ruins your take, and then handle tough spots in post with AI tools like Auphonic or Adobe Enhance Speech. Most importantly, skip noisy rooms and loud peaking, because those problems snowball fast.
Ready to improve this today? Pick one tip from this guide (6 to 12 inches distance, slate clap, or a quick -6 dB level check) and test it on your next take. Share your before and after results in the comments, and subscribe for more video audio fixes.
Want a faster start? Grab the free audio clarity checklist (mic distance, placement, level targets, and dual-track steps), or see the full wireless mic roundup to match your shooting style.