Great background music adds mood fast, but it can drown out your voice just as quickly. Maybe you’ve watched a YouTube clip where the music feels louder than the talk, and you end up turning the volume up (then the next line blasts you). In this guide, you’ll learn how to add background music without overpowering speech, so your message stays clear.
The fix is simple, not magic. You’ll set the right volume ratios, use EQ cuts to give your voice room, and apply ducking so the music steps back when you speak. This guide uses 2026 best practices like dropping music 12 to 18 dB under dialogue and keeping mixes around -14 LUFS for steady playback.
Along the way, you’ll also pick safer track types (instrumentals, smooth loops) and use quick transitions that don’t fight your words. Next, start with the first tip: choose the right music so it naturally sits under your speech.
Choose Tracks That Blend Seamlessly with Your Voice
Picking the right background music comes down to one goal: support the speech, don’t compete with it. When the track has a simple role, your voice stays in the spotlight. From there, you can fine-tune volume, fades, and cuts so the audio feels natural.
Stick to Instrumentals and Steady Tempos
Start with no-lyric tracks. When there are no words, you remove the biggest distraction. Even soft vocals can pull listeners’ attention away from your message. Think of lyric-free music like room temperature air, it makes things feel better without stealing the show.
Next, choose tracks with a steady, loopable beat. Loopable music matters because you can repeat it across longer videos without your track feeling like it’s “ending” every few seconds. Also, consistent rhythms let you build clean edits, so your background stays calm instead of twitchy.
For tempo, match the music pace to how fast you speak. A good starting range for many voiceovers is 60 to 80 BPM. If your content runs more like everyday talk, try 90 to 110 BPM. If you’re tempted by faster tracks (120 BPM or higher), use them only for brief moments, like a title card or a hype beat, then step back during the main talking.
When you edit, treat fades like punctuation. Don’t fade the music in and out randomly. Instead, align fades with sentence breaks, breath pauses, or the ends of sections. Also, use short crossfades when you cut between music clips. That way, the transition happens while the voice already carries attention.
A simple rule helps you avoid abrupt changes: cut or fade on silence you actually have. If your voice continues, your background should keep moving smoothly.
Here’s a quick approach you can apply immediately:
- Choose a loopable track with a consistent beat (no sudden drops).
- Trim the loop so it aligns with your edit points.
- Fade music down slightly at the moment your speech starts, then let it sit low.
- When you switch sections, crossfade over the same length every time.

Choose your track like you’re picking a couch cushion for a long talk. It should be comfortable, stable, and stay out of the way. Now you just need to find tracks that match your exact vibe.
Hunt for Royalty-Free Gems That Fit Your Vibe
In 2026, you have plenty of places to find music that plays nicely with speech. The key is to start with royalty-free or properly licensed libraries, then pick tracks that match the mood of your topic. After all, a wrong track doesn’t just sound off, it can also create legal headaches later.
If you want an easy win, begin with proven libraries such as Epidemic Sound and YouTube Audio Library. These are popular because they focus on clearance and creator use. Still, don’t assume every track works the same way.
Before you download, check the license terms every time. Look for answers to these questions:
- Can you use the track in videos uploaded to YouTube and other platforms?
- Do you need attribution for free downloads?
- Are there limits on duration, monetization, or distribution?
- Does the license change if you remix, reupload, or compile clips?
Also, verify that the track matches your content style. For education, go for ambient textures or calm piano that won’t grab attention. For vlogs, try subtle beats with light percussion, so your voice stays clear but the vibe feels alive. If your video includes transitions, choose music that won’t introduce sudden build-ups right when you start speaking.
Here’s a mood-matching example you can copy:
- Calm piano for tutorials: use gentle, repeated motifs with no lyrics. Keep the tempo in the 60 to 80 BPM zone, then loop it under your narration.
If you want a quick starting checklist for libraries, use this short shortlist:
- Epidemic Sound for large, cleared catalogs.
- YouTube Audio Library if you want built-in YouTube-focused options.
- Pixabay-style free music sites when you can confirm “no attribution” rules.
- Other creator libraries, as long as the license clearly allows your use case.
One more practical tip: test two tracks before you commit. Import them into your editor, then play over real narration levels. If the music pushes your voice into the background, swap it early. That one habit saves hours of mix rework.
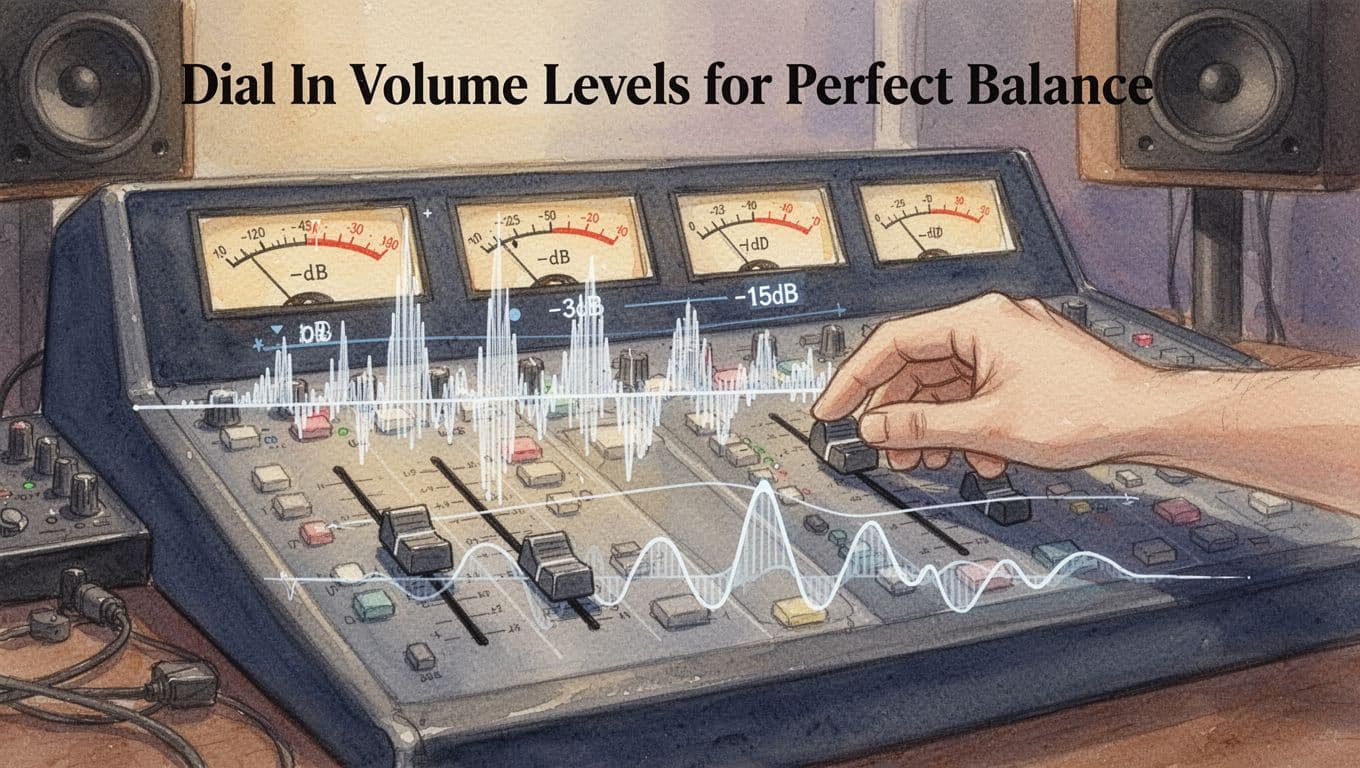
Dial In Volume Levels for Perfect Balance
Getting volume right is the fastest way to stop background music from bullying your speech. In plain terms, you want your voice to sound clear and consistent, while the music stays present but smaller.
A reliable starting point is this: set speech to peak around -3 dB or higher, then keep music about 12 to 18 dB quieter (often -15 dB relative to speech). After that, confirm your overall loudness using LUFS integrated loudness, which measures how loud your whole audio track feels to people, not just the loudest moment.
Hit the Sweet Spot with dB Ratios
Think of your mix like a conversation in a café. If the cups clink too loudly, you miss the words. Your job is to keep the music in the “cups in the background” zone.
Here’s how the dB ratio logic works in practice:
- Voice peaks higher: speech transients jump up fast, so you want peaks around -3 dB or higher.
- Music averages lower: music has a steady bed, so it should sit 12 to 18 dB below the voice peaks.
To keep things simple, use a volume rule of thumb and then verify with loudness meters:
- Set voice peaks to about -3 dB (or a little below if your editor makes that easier).
- Set music average so it lands roughly 12 to 18 dB quieter than speech.
- Aim for an overall loudness around -14 LUFS for consistent playback on common platforms.
LUFS can feel confusing at first, so remember this key point: -14 LUFS is louder than -16 LUFS. That’s why you often see people recommend -14 LUFS as a steady target. If you want a deeper read on how LUFS relates to platform loudness behavior, check Podtools’ LUFS explanation.
Use this quick “before and after” mental test:
- Before: music sits near the voice, so consonants blur. You find yourself turning volume up, then getting surprised on louder lines.
- After: voice sits forward, and the music supports the mood. Words stay crisp, even when the music loops.
Here’s a side-by-side level snapshot you can copy during setup:
| Element | Target | Why it helps |
|---|---|---|
| Voice peaks | -3 dB or higher | Keeps speech intelligible on quiet moments |
| Music bed | 12 to 18 dB quieter | Prevents masking (music covering consonants) |
| Overall loudness | ~ -14 LUFS | Gives consistent playback loudness across devices |
If you want a second reference for LUFS standards thinking, see LUFS standards by Josh Vamos.
Test Your Mix on Real Devices
Once your meters look right, test like a viewer, not like an engineer. Rooms change everything. So do earbuds, car speakers, and phone volume limits.
Start with quick imports and meter checks, then adjust by ear:
- Import your voice track and music track into your editor.
- Lower music until speech stays clear.
- Use meters to confirm voice peaks near -3 dB or higher.
- Check loudness (LUFS integrated) and adjust the music bed if needed.
- Export, then test the exported file, not your timeline.
Then run the same playback through a few real outputs:
- Headphones (best for spotting masking and harsh peaks).
- Phone speaker or earbuds (best for quick “is it understandable?” checks).
- Car speakers (best for real-world bass and loudness behavior).
In your first pass, listen for two trouble signs. First, do the words fade into the music on longer sentences? Second, do the loud consonants feel sharp or close to clipping? If either happens, fix it with small moves to the music level and a smooth fade at speech starts.
Also, avoid hard cuts. Instead, use short smooth fades (for example, a quick ramp down on music when speech begins). Hard cuts create a “jump” that makes listeners feel off-beat.
Finally, export at 48 kHz for quality, especially if you plan to mix, master, or upload to multiple platforms later. When your export settings match your workflow, your LUFS readings and perceived balance stay more stable.
Carve Out Space with EQ to Let Speech Shine
EQ is where you “make room” without making the music feel weak. Think of it like moving chairs in a crowded room, you don’t remove the party, you just stop bumping into voices.
Start with one idea: speech wins in the presence zone, and everything else gets tucked around it. Then tweak EQ in small moves, because a tiny cut can do more than a big fader dip.
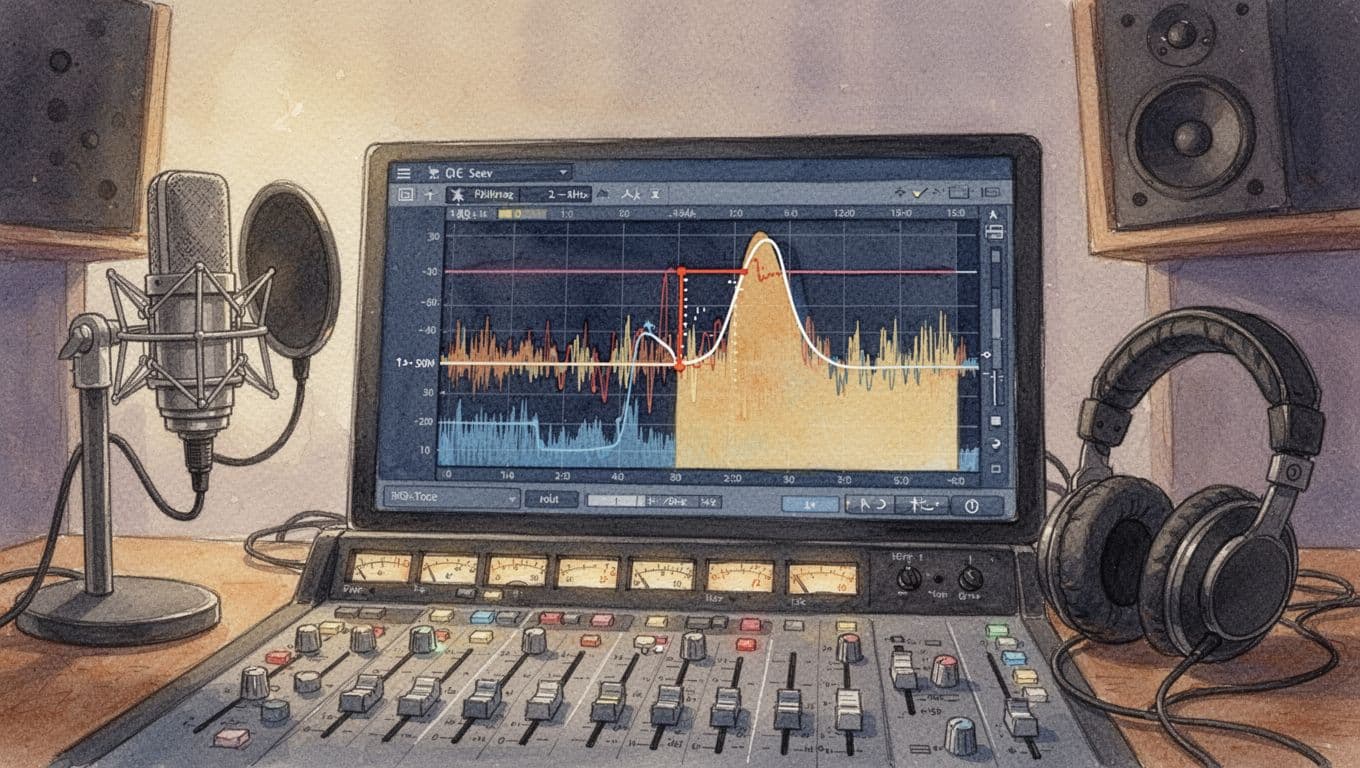
Target the Mids Where Voices Live
Most spoken words live in the 2 kHz to 5 kHz range. That’s where consonants and intelligibility show up, so if the music shares that band, your listener feels it as “clash.” Vocals don’t disappear, but they get harder to read.
Here’s why cutting works without muting the music entirely:
- Music often has energy spread across mids, so a narrow dip removes the annoying overlap.
- Speech has sharp moments (like “t,” “k,” “s”), so reducing the music’s presence helps those moments pop through.
- You’re not turning down the music overall, you’re changing its shape where it fights the voice.
Start with surgical cuts on the music track, not a giant EQ overhaul. Use a narrow band so you remove only the problem.
A solid starting setup for the music EQ (try this first, then adjust by ear):
- High-pass filter on the music: cut below 30 Hz with a gentle slope (example: 12 dB per octave).
- Presence clash cut: reduce 2 to 4 dB at 2.8 kHz to 3.5 kHz, using a Q of 2.0 to 3.5.
- If the music still steps on “s” sounds, add a second narrow dip:
- reduce 1 to 3 dB around 4.0 to 5.0 kHz with Q 2.0 to 4.0.
If you want a concrete target, aim for this simple rule: cut music 2 to 4 dB at 2 to 5 kHz, keep the bandwidth tight, and leave the rest alone. Most tracks will suddenly sound clearer in one try.
To dial it in fast, solo the music, then un-solo and listen to intelligibility while you tweak. A helpful trick is to use an EQ “listen” function (if your plugin has it) or quickly A/B your mix with and without the cut.
For guidance on how “presence” affects perceived vocal clarity, see vocal warmth and vocal EQ focus. Even though warmth and presence are different jobs, the same principle applies: small changes in the right bands make the biggest difference.
You can also keep the mix natural by layering ambience. Add a soft bed like light room tone or gentle wind under both voice and music. Because it sits more like background texture, it fills space without grabbing the 2 to 5 kHz band as much as a bright lead instrument would.
Clean Up Lows and Highs for Polish
Now clean the edges. When lows and highs fight each other, speech can sound dull or “watery,” even if your mids are fixed.
Think of it as two jobs:
- Remove low clutter so speech stays tight.
- Tame sharp highs so “air” doesn’t become harshness.
A great place to start is a flat EQ mindset. Then tweak surgically, one move at a time, so you always know what fixed the problem.
Use these EQ moves as your baseline.
Voice track cleanup (clarity without sounding thin)
Begin by cleaning the voice first, because it’s your anchor.
- High-pass filter: cut below 80 to 120 Hz (men often closer to 80 Hz, women often closer to 100 to 130 Hz). Use a standard 12 dB per octave slope.
- Low-mid control (boxiness): if it sounds chesty, reduce -2 to -4 dB at 300 to 450 Hz with Q 1.0 to 2.0.
- Presence boost (only if needed): if the voice feels buried, add +1 to +3 dB at 3.0 to 4.5 kHz with Q 0.7 to 1.4.
- High shelf or gentle reduction: if sibilance gets sharp, reduce -1 to -3 dB above 7 to 9 kHz with a shelf filter (Q not always required on shelves, follow your plugin’s behavior).
Quick reference: speech warmth often feels tied to the lower voice region, while clarity comes from the presence band. If you want a simple map of typical voice ranges, this human voice frequency range explainer can help you visualize where energy tends to land.
Music track polish (keep it friendly under speech)
Next, tidy the music’s lows and highs so it supports the voice.
- High-pass filter: cut below 30 Hz to remove rumble.
- Sub-bass control: consider a small reduction like -2 dB at 60 to 100 Hz using Q 0.7 to 1.2 if the music muddies consonants.
- Warmth boost (subtle, not big): if the music lacks body, use a gentle boost below 100 Hz, like +1 to +2 dB around 70 to 90 Hz, with Q 0.5 to 0.9. Keep it subtle, because too much low warmth competes fast.
- High shelf reduction (tame the glare): if the music feels bright or fizzy, reduce -1 to -3 dB above 8 to 10 kHz with a shelf.
FabFilter Pro-Q 3 is a popular choice because it makes surgical moves easy. If you use it, this FabFilter Pro-Q3 vocal EQ walkthrough shows the practical feel of precision EQ settings.
Step-by-step in common software (fast and repeatable)
Use this mini routine, no matter what editor you’re on.
- Start with EQ on the voice, then switch the music EQ on last.
- Set an obvious baseline: high-pass voice and music, keep shelves gentle.
- Use a narrow band cut first, then a small wide adjustment.
- After every tweak, listen to full mix for intelligibility, not just solo sound.
- Save your settings as a preset if your project repeats.
In practice, the steps look like this by app:
- Audacity (or similar basic editors): start with a low rolloff/high-pass around 80 Hz for men, then test the voice. Then reduce one problem mid band if you hear “box.”
- Adobe Audition: insert EQ, enable band solo, sweep the 2 to 5 kHz area on the music to find clash, then add a narrow cut. Follow with a high shelf trim if needed.
- Premiere Pro (effects): use your EQ band controls similarly, but keep cuts narrow. If the effect is limited, do the detailed EQ in your audio plugin or roundtrip to a DAW.
A simple layering tip that keeps EQ from fighting itself
One common mistake is using EQ to “fix” everything that belongs to arrangement. Instead, add ambience in a way that supports speech.
Try this:
- Keep wind or room tone very low (mostly felt, not heard).
- EQ the ambience with a high-pass at 150 to 250 Hz, so it doesn’t steal low clarity.
- Then blend it so speech stays forward even when the music changes.
When you do this, your mid cuts feel cleaner, and your highs stay polite. Plus, listeners sense smoothness instead of “edited audio.”
Automate the Magic with Ducking and Keyframes
Manual fades are fine when the music only changes once. But when speech moves fast, ducking saves you time and keeps the mix even. Think of it like a bouncer at the door, whenever your voice shows up, the music steps back automatically.
Auto-ducking also helps your mix feel “done” across the whole video. You spend less time chasing problem moments, and more time making the voice easy to hear.
Still, it’s smart to understand both options: auto-ducking for consistency, and keyframes for precision when you need creative control.

Set Up Auto-Ducking in Your Editor
Auto-ducking usually works by sidechaining a compressor. In plain terms, your voice track triggers a gain drop on your music track. As soon as you start talking, the music dips, then it returns when you stop.
Here are solid starting settings you can use in most editors with sidechain compressors:
- Threshold: -20 to -30 dB
Lower the threshold if the music doesn’t duck often enough. - Ratio: 8:1 (start here, then soften if needed)
Higher ratios drop the music more during speech. - Attack: under 10 ms (start around 1 to 5 ms)
A fast attack keeps consonants from getting buried. - Release: 80 to 180 ms
A medium release sounds natural for most podcast and YouTube pacing.
Next, set up the sidechain routing. Most tools ask for two inputs:
- The compressor sits on the music track.
- The voice track feeds the sidechain input (sometimes called “key” input).
If you want a quick reference for the concept and typical setup, see a complete sidechain guide. Even if your editor labels things differently, the logic stays the same.
Then, turn off any “makeup gain” at first. You want to hear how much the ducking actually pulls the music down. After that, you can add a small gain later if the music feels too quiet overall.
To keep the ducking from sounding mechanical, match the release time to how you speak:
- Faster release if your sentences are short.
- Slower release if your narration flows in longer lines.
Finally, do a quick test loop: play one minute of real narration, not silence. Adjust threshold by small steps until the music dips only when you actually speak.
Software examples (Audition, DaVinci Resolve, and Audacity)
Different editors name the same tools differently. The setup still follows the same pattern: compressor on music, voice as the trigger.
Adobe Audition Use the compressor on your music track, then enable the sidechain or key input. Set the compressor controls to a strong ratio with a fast attack, then tune threshold and release based on your voice. A practical walkthrough for voice-over ducking exists in the Adobe Audition automated ducking discussion.
DaVinci Resolve Resolve can duck music under dialog using sidechaining. Add the audio processor to the music track, then point the sidechain input at your voice track. If you want a straightforward, step-based setup, follow Boris FX’s Resolve ducking tutorial. Use their starting points, then tighten attack and release for your speaking style.
Fallback for simpler tools (Audacity) Audacity may not feel as “one-click” as a DAW, but you still have options. The built-in Auto Duck effect lowers selected tracks when a control track crosses a threshold. That’s the same idea, just without a full sidechain compressor workflow.
If you want the exact control parameters, start with Audacity’s official explanation of Auto Duck. You’ll use threshold plus fade times to avoid harsh jumps.
In most projects, you’ll land near these practical results:
- You see 3 to 6 dB of gain reduction during speech.
- The music returns smoothly between sentences.
- Speech sounds consistent, even when the narration speeds up.
Auto-ducking vs keyframes (when to use which)
Auto-ducking handles the “default behavior” very well. It keeps your voice forward without you micromanaging every moment.
Keyframes still matter when you want intentional shape. For example, you might want:
- Music to dip only during dialogue, not during voice breaths.
- A bigger duck during a dramatic line, then a gentler dip after.
- A slow fade back as a section ends.
Here’s the mental rule I use:
Ducking is your safety net. Keyframes are your creative brush.
So, start with auto-ducking. Then add keyframes only where the automatic behavior doesn’t match your intent. That combo usually gets you the pro feel without the endless timeline work.
Grab These Top 2026 Tools for Easy Mixing
If you want background music that sits under speech, the fastest path is picking the right tool for your workflow. In 2026, most editors make it easier to control volume, carve out space with EQ, and automate ducking when you talk.
Instead of fighting your timeline all afternoon, use tools that already understand the “voice first” goal. Then you only tweak what matters.
Free and budget tools that still get the job done
You can mix music under speech without paying much. These options handle EQ, simple automation, and (in some cases) ducking in a direct way.
Audacity (free, Windows/macOS/Linux) Audacity works great when you want a no-frills setup. You can combine EQ cuts, fades, and auto-duck-style behavior. Also, it’s easy to learn because you can see every track clearly.
For the ducking piece, Audacity’s Auto Duck effect uses a control track to trigger volume drops. That maps well to “music dips when voice plays.” If you want the exact behavior, use the Audacity Auto Duck manual page.
GarageBand (free on Mac, also available on iOS) GarageBand is beginner-friendly, because it keeps routing simple. You can drag in voice and music tracks, then use built-in voice tools and basic mix moves.
For ducking on iOS-style workflows, audio ducking guides help you picture the idea even if your buttons look different. This guide covers the basics in a clear, practical way: audio ducking on iOS.
Best for your first mix If you’re starting today, these two cover the core needs:
- EQ room for speech (especially mids)
- Ducking or automated volume dips
- Fast export for testing on real devices
Pro DAWs for tighter control (and smoother results)
Pro tools give you deeper control over timing, dynamics, and cleanup. When you want consistent loudness across episodes or videos, these apps help a lot.
Adobe Audition Audition stays popular for voice-first projects. It includes workflows that support automated ducking concepts and essential audio panels that speed up cleanup and balance. If you want a hands-on look at Audition auto-ducking, Adobe’s own article is a useful reference: Audition deep dive on auto-ducking.
Logic Pro Logic Pro shines when you already think in terms of effects and routing. It lets you set up sidechain-style compression and refine the envelope with precision. Also, its sound shaping tools are strong, so your EQ cuts stay clean and musical.
DaVinci Resolve and Premiere Pro (video-first) If your project is video, these tools help you keep everything in sync. Premiere Pro supports automated audio workflows inside the Essential Sound area, and Resolve provides mixing tools within its video pipeline.
The main reason to choose them is simple: you avoid exporting a voice mix just to re-import it into your editor.
Podcast and “AI-assisted” editors built for fast voice/music balancing
Some creators do not want to think about EQ bands all day. For that, AI-assisted tools can handle separation, leveling, and volume behavior while you stay focused on content.
Descript Descript is built around editing spoken audio like text. More importantly for you, it supports features designed to add music behind speech without constantly riding the faders. If you want a direct walkthrough of adding background music, Descript explains the process here: add background music in Descript.
Also, Descript updates its workflow with AI helpers for timing and volume control. If you want an overview of what’s new around leveling and timeline edits, check Descript 2026 automatic volume leveling.
Riverside (podcast-first workflow) Riverside makes remote recordings easier, and that matters because the mix starts with cleaner audio. If your voice sounds consistent from the start, your background music naturally behaves better.
Side-by-side: which tool fits your 2026 workflow?
Here’s a quick comparison so you can choose without overthinking.
| Tool | Best for | Mixing speed | Ducking support | Voice clarity tools |
|---|---|---|---|---|
| Audacity (free) | Simple voice and music projects | High | Auto Duck effect concept | EQ + manual control |
| GarageBand | Quick edits on Mac/iOS | High | Built-in options vary by workflow | Essential Sound style tools |
| Adobe Audition | Podcast and video audio mixing | Medium to high | Strong auto-duck workflows | Repair and voice cleanup |
| Logic Pro | Detailed music-oriented mixing | Medium | Sidechain-style workflows | Deep effects and EQ |
| Premiere Pro | Video editing with music under dialogue | Medium to high | Essential Sound tools | Audio cleanup within editor |
| DaVinci Resolve | Video projects with robust audio mixing | Medium | Sidechaining and dynamics | Fairlight tools |
| Descript | Fast edits with AI support | High | Auto balancing behavior | Voice separation and leveling |
| Riverside | Podcast recording to publish | High | Often handled in post | Cleaner inputs reduce mix work |
Takeaway: pick the tool that reduces steps. Less friction means you test more, and testing is what makes speech intelligible.
Quick-start settings that work across most tools
Even though interfaces differ, the mix goal stays consistent: keep speech forward, then let music sit behind it.
Start with these habits, then adjust by ear:
- Set speech as the anchor: keep voice peaks hot enough to stay clear.
- Drop music volume until consonants stay crisp.
- Use EQ cuts on the music where voices get sharp.
- Add ducking (or automation) so music backs away during words.
- Test on earbuds and phone speaker before final export.
When you use ducking, think of it like a hallway rule. Your voice is the person walking through. The music steps to the side each time someone speaks.
If you want a simple ducking reference for Audacity, re-check the behavior on the Auto Duck manual page. For Audition, use the auto-duck concept article to match the workflow: Audition auto-ducking music guide.
Beginner path: the easiest way to mix speech and music in 2026
If you’re new, don’t start with the most complex tool. Start with a setup you can repeat, then refine it.
Here’s a beginner path that stays simple:
- Choose Audacity (free) if you want full control without a subscription.
- Or choose GarageBand if you want a smoother start on Mac or iOS.
- Import your voice and music tracks, then line up the start.
- Reduce music volume until speech sounds comfortable.
- Add Auto Duck behavior (in Audacity) or the closest built-in ducking option.
- Apply EQ to music only, using small cuts in the midrange where speech lives.
- Export, then listen on your phone. Make small changes based on intelligibility, not vibes.
Now, if you want a faster “AI-assisted” route, pick Descript:
- Import your audio.
- Add background music with its built-in workflow.
- Use its leveling features to keep speech steady under different music sections.
- Finish with quick ear checks, then export.
Whichever path you choose, keep one mindset: your listener follows your words. Music should feel like a soft floor under the conversation, not a spotlight that steals attention.
Conclusion
You already have the core winning formula: pick music that supports speech, then control it with clear volume ratios, EQ carve-outs, and ducking when the voice shows up. When you keep the mix hierarchy (voice forward, music behind), your message stays readable and your background track feels intentional.
Start on your next project with one simple move today: set music 12 to 18 dB below the voice, then apply a quick EQ cut in the midrange where talking can get masked. After that, use ducking (or keyframes) to keep the music stepping back during every spoken line. Test on earbuds or a phone speaker, and adjust until the words feel effortless.
Want a quick check for your own work? Where do you notice the music pulling focus first, in the pauses or on the consonants? Share your setup and results in the comments, and subscribe for more audio tips that help your voice stay clear as you publish in 2026. Balanced mixes boost engagement because people stay longer when they never have to “turn up” the story.