A barking dog, traffic outside, or kids talking in the next room can ruin an otherwise great video call. You start saying one thing, then the app hears everything else. That’s a fast way to lose confidence in meetings, podcasts, or even livestream chats.
The good news? You can reduce background noise without buying a studio. Small changes to your habits, room setup, and settings often make the biggest difference. Ready to sound pro without fancy gear?
This guide walks through quick fixes you can try today, plus simple household hacks, budget tools, and AI noise apps that clean up your audio in real time. If your mic has been fighting your home environment, these steps will help it win.
Let’s start with what you can do in minutes.
Master These Quick Habits to Block Noise Instantly
When background noise sneaks in, it’s usually because your mic is too far away, too exposed, or picking up echoes from the room. Fix those three things first, and you often see an instant improvement during calls.
Try these quick habits for reduce background noise during calls, especially in Zoom, Google Meet, Microsoft Teams, and similar apps.
- Mute when you’re not speaking. Noise spikes often happen when you forget to mute. It also stops random sounds from cutting into the other person’s audio.
- Move your mic closer (and slightly off to the side). If your voice travels less distance than the hum and clicks, your app prioritizes you.
- Use a “small and soft” setup. Bigger rooms with hard walls create ringing echoes. Carpets, curtains, and furniture reduce that ringing.
- Turn off nearby noise sources. Fans, box fans, and HVAC vents can sound louder on a mic. If you can, pause them for the call.
- Do a 15-second test before the meeting. Say a few sentences. Listen on your own call preview. Adjust right away.
These tips sound simple because they are. For example, in one Zoom meeting scenario, someone would unmute and immediately get buried under keyboard taps and chair squeaks. After a two minute mic adjustment and “mute between points,” their voice stayed clear the whole time.
Mute Smartly and Position Your Mic Right
Muting is more than manners. It controls what the listener hears when you’re silent. So, when you’re reading notes, set your mic to mute, then unmute only when you speak.
Next, mic placement matters more than people think. A headset mic that’s too far away gives background noise an equal chance to enter. That’s why your voice sounds weaker, even if you think you’re speaking clearly.
As a rule of thumb, place a boom or headset mic two finger widths from your mouth, slightly off to the side. This helps capture your voice without as much of the room’s sound. Aim it toward the corner of your mouth, not straight into your lips. Then test again.

Here’s a quick mental model: your voice is a narrow beam. Background noise is like a fog that fills the air. When the mic sits close, the beam gets to the mic faster and louder than the fog.
Also, check your distance from “noise edges.” If your mic faces a noisy window, fans, or the kitchen area, it will pick up those signals. Even turning your whole chair 45 degrees can help.
If you use a laptop mic, try this: keep the laptop lid angle steady, then place the mic-facing side toward you. Most laptop mics sound best when they sit close to your mouth and directly in front of your face.
If your audio improves when you lean in, your mic is too far away. Fix the distance first.
Pick the Perfect Quiet Spot in Your Space
Not all “quiet rooms” are quiet to a microphone. A mic can hear what your ears ignore, like the hum of a power strip or the buzz from a monitor.
Choose a spot where sound behaves in your favor:
- Prefer a small room over a large open one. Smaller spaces usually create fewer echo paths.
- Use soft surfaces whenever possible. Carpets and rugs help. Curtains help too.
- Stay away from windows and vents. Glass and airflow can add harsh reflections.
- Avoid placing your mic near a fridge, AC unit, or fan. Those sounds come through even when you think they’re “not loud.”
Think of your room like a drum. Hard floors and bare walls make the drum louder. Soft items act like “sound sponges,” so your voice becomes the main signal.
In a home office, a good trick is to sit with your back toward a bookshelf or closet. Books and clothing break up reflections. If the room has a strong echo, you’ll hear it during your test recording.
One more practical habit: turn off the “background noise you can’t hear.” For example, the fan inside your laptop bag might run on your schedule. Also, check if your phone is vibrating nearby. Those tiny sounds travel through surfaces.
Once your spot is set, keep it consistent. The more stable your setup stays, the easier it is for noise filters to work.
Household Items That Turn Your Room into a Noise Trap
You don’t need foam panels or a spare budget to sound better. You need the right materials in the right places. Even simple changes can reduce echoes and absorb sharp sounds, like foot taps, chair shifts, or typing.
This kind of quiet is different from “active noise canceling.” Instead, you reduce reflections and clutter in your sound path. That makes your voice cleaner before any app touches it.
If you want more ideas that stay practical, look at ways to quiet common household noises from Lifehacker. It’s a good reminder that many noise problems start with everyday stuff.
Blankets and Pillows: Your Wall and Corner Warriors
Blankets work because they’re thick and soft. They slow down sound waves and reduce the “bounce” that creates echo. If you’ve ever tried calling someone from a closet, you already know the effect of lots of fabric nearby.
Try this simple setup:
- Hang a heavy blanket on the wall behind you. Use a curtain rod, hooks, or even strong tape strips on a non-painted surface.
- Place one blanket to the side if you know the noisy area sits over there.
- Put a pillow or two in corners where sound tends to collect. Corners can amplify boxy echo.
In real life, this can feel like a mini transformation. A lot of people notice it right away: you sound less “tinny,” and your words feel more grounded.
If your room is hard-walled and echo-y, add a rug. Even a thick area rug can reduce floor reflections. Then use pillows like “quick corner traps” during calls.
For design-minded ideas that still focus on sound damping, check sound-dampening hacks from Emily Henderson. You can copy the mindset without copying the exact look.
Bookshelves and Rugs for Natural Sound Scatter
Bookshelves do two helpful things. First, they break up reflections. Second, they add irregular surfaces that scatter sound.
If you have a bookshelf behind your chair, keep it messy on purpose (in a good way). Back the area with books, binders, or even stacked boxes. Don’t build a perfect square wall of books. Aim for varied depths.
Rugs act like a low-cost audio blanket for the floor. When feet shuffle, a mic will hear impact. With a rug, those impacts shrink.
If you’re in a room where hanging things is tough, try a floor-first approach:
- Put a rug under your desk area.
- Use a foam mattress topper (if you have one) to reduce foot noise and ringing.
- Add a thick chair cushion to cut chair squeaks and tap sounds.
You’ll get the best result when your voice path includes soft surfaces. Meaning, the sound from your mouth should “travel into softness,” not straight into bare wall and tile.
Turn a Closet into Your Secret Sound Booth
Closets are underrated. They already contain soft fabric, hanging clothes, and surfaces that reduce echo. If you want a quick “recording mode,” use it like a tool, not a permanent change.
Here’s a simple step-by-step:
- Clear a small space in the closet. Keep the mic pointed at where you’ll stand.
- Close the closet door if it won’t make you breathe too hard.
- Hang clothes so they spread out, not pressed together.
- Stand 6 to 12 inches from the mic (or as close as your setup allows).
Then do your test recording. If your voice sounds close and warm, you found your setup. If it sounds too muffled, step back a little.
This works for calls too. You might not want to join every meeting from your closet, but it’s a solid option for tough days. Especially if you live near traffic or a shared hallway.
The best part is how fast it feels to go from “chaos audio” to “clear speech.” Many people report that their voice becomes easier to understand even without AI tools.
Grab Budget Gear and Apps for Pro-Level Quiet
Once your room and mic basics are set, you can go further with budget gear and software. The goal isn’t perfection. It’s reducing the noise your audience hears the moment you speak.
In March 2026, AI noise control is a big reason this got easier. Tools now handle real-time cleanup for calls and live audio. Still, they work best when your mic already captures your voice first.
If you’re comparing budget noise canceling options for travel or focus time, RTINGS’ pick for budget noise cancelling headphones can help you choose without overthinking.
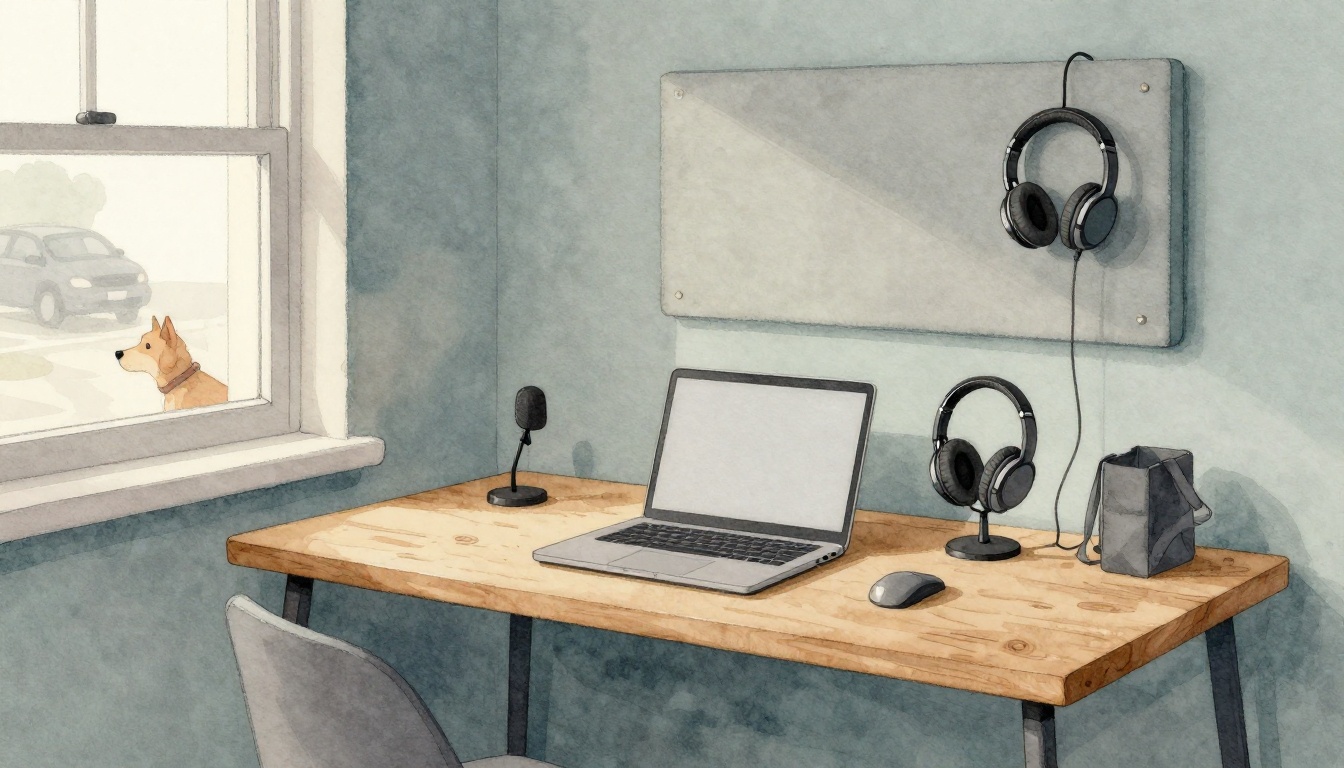
Affordable Headsets and Mics That Ignore the Chaos
Built-in laptop mics are convenient, but they often pick up everything in the room. A basic USB headset usually improves clarity right away because it positions the mic near your mouth.
Look for these features when you shop:
- A headset mic that sits close to your lips
- A boom arm (for angle control)
- Consistent mic monitoring (so you can hear what the other person hears)
Under $50, you’ll often see simple USB and wired models on sale. Some popular budget categories include headsets from Cyber Acoustics, such as AC-204ENC II and AC-304, especially when discounted. If you buy one, pair it with the software steps below, not just “plug and pray.”
Also consider over-ear noise canceling headphones for yourself. That doesn’t remove noise from your microphone, but it can help you speak more calmly. When you stop shouting over the room, your mic captures less chaos.
For a broad view of noise canceling options at many budgets, Soundly’s guide to noise canceling headphones at every budget can help you understand what’s worth paying for (and what isn’t).
Budget gear works best when you combine it with correct mic distance. Distance beats fancy specs.
Free Software Tricks Built into Your Devices
Before paying for anything, turn on the noise tools your devices already have. Many platforms include background suppression modes.
Try these common free steps:
- Zoom: Find Audio settings, then use background noise suppression (often with low, medium, and high options). Start low to avoid a “watery” voice effect.
- Microsoft Teams: Enable noise suppression in meeting audio settings (if your version shows it).
- Google Meet: Check microphone and audio settings for noise reduction options (it may vary by account and device).
On Windows, noise cleanup tools can help too. Windows 11 includes Voice effects features that may reduce background noise in supported apps. To find it, open Windows Settings, then search for Voice effects or a similar label, and turn on suppression.
Also, if you record audio with a phone, use a stable mic distance. Most “cheap improvement” comes from staying consistent.
Finally, reduce the room sound before you even press record. A laptop fan, a ceiling vent, or a humming charger can all show up louder on recordings. Unplug what you can, or move your desk an inch away from the source.
AI Apps That Wipe Out Noise in Real Time
When the room is messy, AI can act like a second filter layer. In real time, it tries to isolate your voice and reduce background sounds.
Krisp is one of the best-known options for this. It works across many conferencing apps and can clean background sounds while you talk. If you want a quick overview of what people test and how it compares, see Krisp review and alternatives from MeetingCompare.
If you want a trend to watch in 2026, AI noise filters are spreading into more built-in apps. Some call apps now include voice filters that block traffic, wind, or yelling during calls. It might be optional, so you can test it without committing to a new workflow.
On the AI side, you’ll also see more “voice-first” tools paired with AI audio processing. For setups with an NVIDIA RTX GPU, NVIDIA Broadcast (or similar tools in that space) can use your hardware for noise reduction. Pairing these tools with a decent mic often sounds more natural than cranking up every setting at once.
For recordings, post-processing tools also help. Software like Audacity with noise reduction plugins can reduce steady noise, though it depends on the quality of your original capture. For more demanding cleanups, paid options like iZotope RX are popular among creators.
So what should you do if your goal is “best result with least effort”?
- Turn on the free noise suppression in your meeting app.
- Use a headset or mic that sits close.
- Only then test Krisp or an AI voice tool for tough situations.
Then, do one last test. Your best noise setup is the one that still sounds like you.
Conclusion: Reduce Background Noise Starting Today
Background noise doesn’t have to decide how your meetings go. When you reduce background noise with simple habits, smart mic positioning, and a softer room, your voice comes through clearly.
Start with what’s fastest: mute when you’re not speaking, move the mic closer, and pick a quiet spot. Next, try one household fix like a blanket behind you or a rug under your desk. If you still hear chaos, add AI noise control on top.
Now pick one action from today and try it in your next call. Then listen for the difference. If you’ve found something that works, share it in the comments, and see if it helps someone else sound more confident this week.