You can tell when a video maker practiced. The camera feels steady, the light looks kind, and the edit moves your eyes.
One creator shared a simple routine: one hour a day for 30 days. Their shaky phone clips turned into smooth, watchable videos. The secret wasn’t talent. It was practice with clear drills, in the right order.
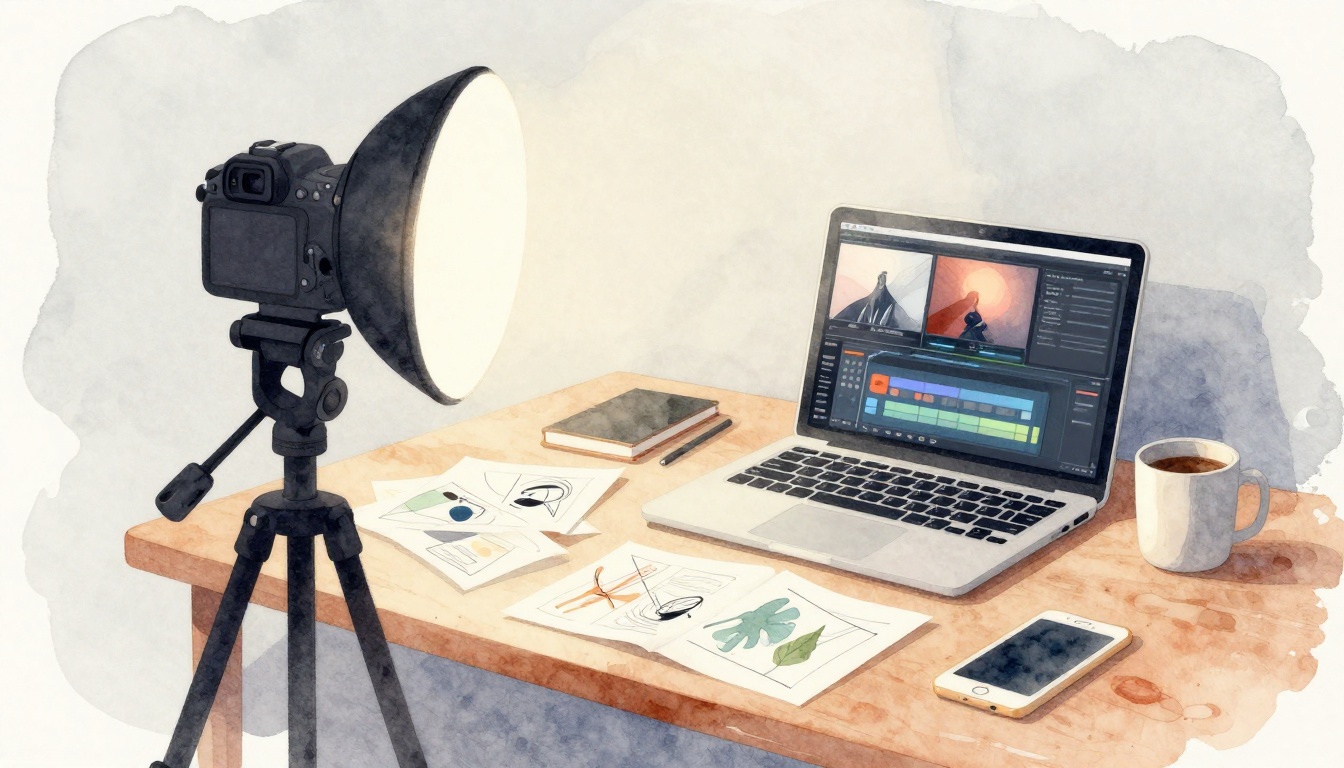
This guide shows you how to improve your video skills with practice, step by step. You’ll do daily filming drills (no editing yet), set up better lighting on a budget, practice fast editing habits, and review footage like a coach. Then you’ll build a routine that fits your level, and you’ll use 2026 short-video trends without copying anyone’s style.
Kick Off with Filming Drills That Make Shots Look Pro
Before you touch editing, train what the camera sees. If your shots are strong, editing becomes easy. Also, you save time because you’re not “fixing” weak footage later.
Start with a simple rule: keep your practice focused. For filming days, you only work on camera framing and movement. That means no cutting, no color changes, and no audio cleanup.
Here’s a great daily drill: pick one scene and film it for 30 seconds, three ways. Same subject, same spot, new approach each time. Then choose the best version and repeat tomorrow with a small change.
For example, try this trend-friendly shot flow:
- Hook close-up (start with emotion, face, or a detail)
- Explain shot (show what you mean, keep it steady)
- Context shot (pull back so viewers understand the scene)
You’ll notice something fast. Shots stop feeling random. They feel planned. That planning can be tiny, like a 3-item shot list.
Example shot list for one mini-scene:
- Subject framed, looking at lens (15 seconds)
- Same scene, off-center framing (10 seconds)
- Wider view, showing where you are (5 seconds)
To make framing easier, turn on your camera grid. Also, use your feet more than your hands. Move your whole body to reframe instead of zooming or wildly panning.
If you want a deeper refresher on composition basics, rule of thirds examples in videography can help you spot what “balanced” really looks like.
Practice Rule of Thirds for Balanced Frames
The grid isn’t magic. It just gives you a target. When your subject sits on a grid line, your video looks less like an accident.
How to use it:
- Turn on the camera grid in your phone or camera settings.
- Place your subject on the left or right third.
- Use the intersection “cross points” for the most important part (eyes, product label, or face).
Think of it like music timing. Center framing can feel “on beat.” Off-center framing feels more alive, like a singer leaning into the chorus.
Quick example: if you film a meal review, don’t place the plate dead center. Move it slightly to one third. Then let the background fill the other side. Your viewer feels direction and focus.
Daily drill: walk and shoot one short clip per meal or per walk. Reshoot each clip once using the grid. Keep the camera level. Then stop. Your goal is consistency, not complexity.
Build Depth to Avoid Flat Videos
Flat video looks like a photo that forgot to breathe. Depth fixes that. It also makes small scenes feel cinematic.
Depth is simple: mix objects at different distances.
- Foreground: something near the lens (a hand, a chair edge, leaves)
- Middle ground: your subject (you, the product, the main action)
- Background: something farther away (a door, a hallway, a street)
A quick example: if you’re filming a room, put one object close to the camera (like a mug on the table edge). Then place your subject in the middle. Finally, let the room lines and doorway sit behind.
Drill for room scenes with props:
- Set your subject in the middle.
- Place one small object close to the camera.
- Film for 20 seconds, then step back slightly.
- Film again, same framing effort, different depth.
You’ll start seeing why some videos “pop.” The viewer has layers to follow, instead of one flat wall of pixels.
Light Your Videos Like a Studio Pro on a Budget
Good lighting doesn’t require studio gear. It just needs a plan. When your face looks clear and your background feels separate, viewers stick around longer.
The easiest beginner win is three-point lighting:
- Key light: the main light, usually from the side
- Fill light: softer light that reduces harsh shadows
- Backlight: light behind you that creates separation
You can use a window, a desk lamp, or a cheap LED panel. Just avoid harsh overhead light if you can. Overhead makes eye sockets look deep, and it creates ugly shadows under the chin.
Here’s a budget routine that works:
- Beginner day: window light on one side, add one lamp as fill.
- Intermediate day: do a night test with lights at eye level.
- Every day: match your camera exposure (or brightness) so skin tones look natural.
If you want a clear breakdown of the basics, three-point lighting setup guidance gives you a solid reference you can revisit anytime.
Set Up Three-Point Lighting Basics
Start with key light. Put it about a 45-degree angle to your face. Then check your shadows.
Next, add fill light. Keep it dimmer than the key light. Otherwise, you erase the shape and your video looks flat again.
Finally, add backlight. Move it behind you and aim it toward your shoulders. Even a weak backlight helps separate you from the background.
Cheap diffuser tip: if your lamp is too harsh, place a white sheet of paper or a light fabric between the lamp and your face. Move it until the light feels soft.
Also, keep your camera at the same height as your eyes. Lighting looks better when your lens and your subject level match.
Test Setups for Day and Night Shoots
One setup rarely works for all lighting. So practice like a scientist. Test, note, then repeat.
Do 5 lighting tests each week:
- Day 1: window only
- Day 2: window + lamp fill
- Day 3: key light only
- Night 1: lamp key + background light
- Night 2: key + fill + backlight
For each test, write one quick note:
- “Shadows under chin are strong.”
- “Skin looks warm, background looks clean.”
- “Eyes look shiny, try lowering brightness.”
This habit makes your lighting skills stack. Soon, you’ll predict how a setup will look before you film.
Edit Faster and Smarter with Daily Fun Drills
Editing feels hard when you treat every video like a brand-new project. Instead, reuse your process. Practice editing patterns like a drummer practices beats.
Use the IBP idea for quick viral-style edits:
- Imitate: copy the structure you see (not the exact content)
- Breakdown: note the cut timing (where it changes)
- Plan: map your own version before you start
Daily editing drill: take 30 seconds of stock footage and build a mini edit. You’ll practice cuts, text timing, and rhythm.
A simple workflow:
- Trim boring moments quickly
- Keep the sound clean (no random spikes)
- Use text for one clear idea at a time
If you want free options to practice with, best free video editing software in 2026 compares tools so you can pick one and stop switching.
Don’t worry about perfection today. Focus on finishing. Finishing teaches speed.
Break Down Viral Videos to Steal Smart Techniques
Pick one video you like. Watch it once without pausing. Then watch again with pauses.
Write these notes:
- How fast does it show the “point”?
- Where do the cuts happen?
- What changes each time (angle, zoom, text, sound)?
Then remake the edit idea with your own footage. Use the same structure, but your own message. That’s how you train pattern recognition.
Daily Edits to Build Speed and Style
Try this “30-minute improvement” routine:
- 10 minutes: import footage and organize A-roll and B-roll
- 10 minutes: build a 20 to 30-second timeline
- 10 minutes: add one style element (jump cuts, simple overlays, or color tweak)
Beginner-friendly focus: jump cuts and timing. Intermediate creators can add a small color grade and 2 to 3 text beats.
After you export, stop. Don’t keep tinkering for two hours. Tomorrow, you’ll build a new edit and keep your skill growing.
Review Footage Ruthlessly to Fix Mistakes Overnight
Practice feels slow until you review smartly. Then you improve fast.
After each shoot, do a 10-minute check on a big screen if you can. Watch your video like a viewer, not like the person who made it. Pay attention to what loses attention.
Weekly, pick:
- Your 3 best clips (figure out why they work)
- Your 3 worst clips (figure out what went wrong)
Also, don’t guess. Look for patterns. If your shots shake, it’s often tripod habits or stance. If your videos feel dark, it’s usually lighting distance or camera exposure.
Here are review questions that catch issues early:
| What to check | Quick question |
|---|---|
| Framing | Does the subject stay easy to find? |
| Focus | Is the face or object sharp most of the time? |
| Lighting | Do skin tones look natural and not washed out? |
| Audio | Can you understand words without strain? |
| Pacing | Does the edit move before boredom hits? |
| Hook strength | Do you earn the first 3 seconds? |
One gotcha matters: if you only review your favorite moments, you’ll repeat the same mistakes.
Ruthless review means short, honest notes. Then you fix the smallest thing first.
If you want community feedback, share a draft and ask one specific question. For example, “Is the hook clear after 2 seconds?” That makes comments more useful.
Craft Practice Routines for Beginners and Next-Level Creators
You don’t need a full production schedule. You need a routine you can repeat when life gets busy.
Aim for about 1 hour a day. If you miss a day, don’t quit. Just start again the next day. Consistency beats intensity.
Here’s a simple way to plan goals by level:
| Level | Daily focus | Weekly goal |
|---|---|---|
| Beginner (weeks 1-2) | 30-min filming drills, 30-min editing practice | Ship 1 short every day you can |
| Beginner (weeks 3-4) | 30-min lighting tests, 30-min editing timing | Make a 30-day shorts plan |
| Intermediate | 20-min filming depth, 20-min lighting, 20-min edit speed | Build a small portfolio |
| Next-level | Remix trends monthly, refine style | 2 community feedback rounds per month |
Keep a notebook. Track one number per day: “shots filmed,” “edits finished,” or “videos shipped.” Your brain likes proof.
If you’re using AI tools for faster edits, treat them like assistants. For example, AI can help with cuts or captions. Still, you decide the pacing and the story.
Also, follow what’s working in March 2026: short videos that feel real, series that keep returning viewers, and UGC-style clips that build trust.
Beginner Plan: Build Fundamentals in Weeks
Week 1 through week 2 should be calm and simple:
- Learn your tool basics (trim, split, captions)
- Film three scene variations
- Edit one short using a repeatable template
Then ship. You don’t learn from a perfect draft. You learn from a finished draft.
A strong beginner habit: set a timer and finish even when you feel “almost ready.” Finish builds confidence and speed.
Intermediate Goals: Polish and Portfolio Power
Intermediate creators should focus on proof and range:
- Build a portfolio by remaking your best concepts
- Test one new edit style per month
- Ask for community feedback and apply it fast
When you share, ask for one kind of help. Lighting? Hook pacing? Caption timing? This keeps feedback actionable.
For feedback communities, you can start with video editing discussions on Reddit. Read posts first, then share a draft when you’re ready.
Ride 2026 Trends to Make Videos That Go Viral
Trends change fast. But practice makes your content adaptable. Here’s how to use what’s popular right now without losing your voice.
In March 2026, short videos still win. They stay under 90 seconds, and they grab attention quickly. People also respond to real, creator-style clips. That means you can use a vlog tone, Q&A, and simple story beats.
Try this trend drill:
- Pick one YouTube or Shorts video you like
- Copy the structure (hook, middle, payoff)
- Replace the topic with your niche
- Keep your style consistent across the series
AI can help you move quicker. Tools can generate rough cuts or captions, which saves time. Still, your practice needs to cover decision-making, not just automation.
Finally, series beats random posting. Instead of one-off clips, plan a repeatable theme:
- “Fixing common mistakes” videos
- “30-day practice log” shorts
- “Day in the life” mini episodes
This makes viewers return. It also makes your practice feel focused.
Conclusion: Practice Turns Skill Into Confidence
You started with one idea: improve your video skills with practice. Now you have a path that works in real life. Film with drills. Light with a clear setup. Edit faster with patterns. Then review to catch mistakes fast.
Pick one drill today and do it for 30 days. One hour a day changes everything because your brain learns by repetition. Not by wishing.
Practice is the bridge between “I can’t” and “I know how.”
If you want a quick next step: choose one free editor, do 30 minutes of editing practice, and ship one short.
What are the best free tools? Pick one that you’ll stick with. What about daily time? About 1 hour, even if life is messy. What you do every day becomes your skill.